Granny Square Blanket: Complete Guide to Patterns, Sizes, and Construction
Quick Answer
Everything you need to make a granny square blanket — choosing a square style, calculating how many you need, planning the layout, joining methods, and adding a border. Includes size chart and free online calculator.
What Is a Granny Square Blanket?
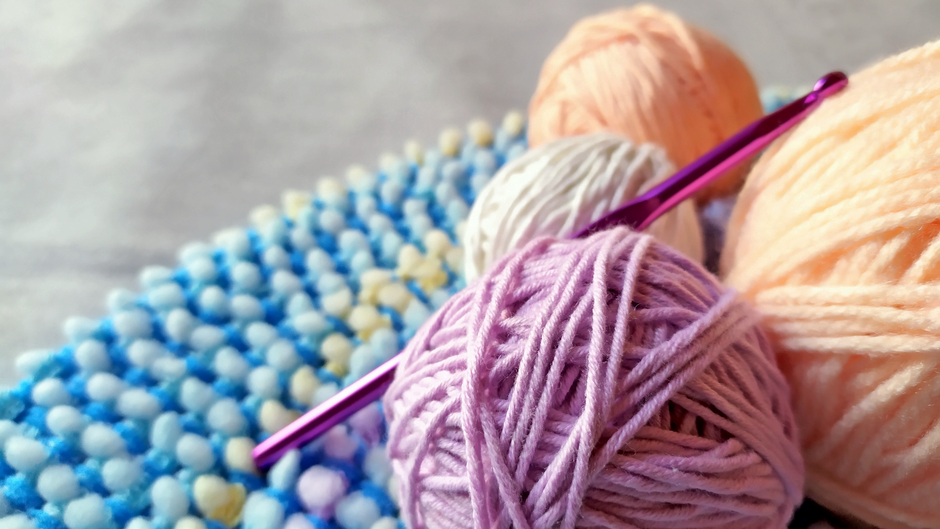
A granny square blanket is made by crocheting individual squares, blocking them to a consistent size, and then joining them into a larger fabric. The traditional granny square uses chain spaces and clusters of double crochet stitches worked in rounds, but the term now covers any square motif that gets joined into a blanket — solid squares, flower squares, sunburst squares, hexagons adapted to square format, and modern flat-color squares are all used interchangeably in the same construction method. The appeal of the granny square blanket is flexibility. You can work on squares in short sessions, swap colors systematically or randomly, and the scale of the project is controlled by how many squares you make rather than how long you crochet in one sitting. It is one of the most beginner-friendly large crochet projects because the individual unit is small enough to master before committing to a full blanket.
Traditional, Solid, Continuous, and Modern Granny Squares
The traditional granny square has an open lacy appearance from its chain-space construction. Each round adds clusters of three double crochets separated by chains, creating a texture that is light, slightly stretchy, and fast to work up. The solid granny square eliminates the chain spaces and fills each round with solid stitches — usually double crochet or half double crochet worked continuously. The result is denser, warmer, and better suited to baby blankets or bed throws where you want less drape and more substance. The continuous granny square (sometimes called the join-as-you-go or endless granny) is worked in a spiral rather than separate rounds with slip stitches, eliminating the slight jog that appears where rounds join. It produces a more uniform fabric and is preferred by makers who want a cleaner look. The modern granny square is a catch-all for variations that update the traditional motif — daisy centers worked in rounds of single crochet with petal-shaped gaps, sunburst squares radiating from a central circle, large solid-color squares made in one round of trebles, and giant granny squares that are themselves the entire blanket worked outward from a center. All of these join together using the same techniques as traditional squares.
How Many Granny Squares Do You Need?
The number of squares depends on the finished square size after blocking and the target blanket dimensions. Divide the blanket width by the square size to get squares across. Divide the blanket height by the square size to get squares down. Multiply for total. A 48×60 inch throw made with 6-inch blocked squares needs 8×10 = 80 squares. If you are using a joining method that adds width — a single crochet join or flat seam — add the joining width to the effective square size before dividing. For a 0.25-inch join, each square takes up 6.25 inches of blanket width instead of 6. Use the ArtPatt granny square calculator to get the exact count and layout grid for your specific dimensions. Always block a test square before calculating — unblocked squares can be 20–30% smaller than their blocked size, and calculating from an unblocked square will leave you with too many squares and a blanket that is larger than planned.
Granny Square Blanket Size Chart
Common blanket sizes and square counts for the most used square sizes. Baby blanket (36×45 inches): 6-inch squares → 48 squares (6×8). Lap blanket (40×50 inches): 6-inch squares → 63 squares (7×9), 8-inch squares → 35 squares (5×7). Throw (48×60 inches): 6-inch squares → 80 squares (8×10), 9-inch squares → 40 squares (not quite, as 48÷9 = 5 and 60÷9 = 6, so 30 squares in a 5×6 grid with a slightly smaller finished size), 12-inch squares → 20 squares (4×5). Full/double (60×80 inches): 6-inch squares → 140 squares (10×14), 8-inch squares → 70 squares (not exact — 7×9=63 or 8×10=80 depending on whether you prefer slightly smaller or slightly larger). Queen (60×90 inches): 6-inch squares → 150 squares (10×15). These counts assume no joining width and round down to the nearest whole square. Add a border to reach the exact target size.
Planning the Layout: Color Arrangement and Grid
The granny square blanket layout determines the final look of the project as much as the square style itself. Three common approaches: random, systematic, and gradient. Random placement is the easiest — make all your squares without a plan and lay them out on a flat surface before joining, moving squares around until no two adjacent squares of the same color share an edge. Photograph the arrangement before joining. Systematic layout uses a repeating unit — alternating two colors in a checkerboard, arranging four different colors in a 2×2 repeating block, or placing one color in the center of every four-square cluster. This approach needs fewer layout adjustments but requires knowing the arrangement before you start crocheting. Gradient or ombre layouts arrange squares from light to dark or from one color to another across the blanket. These require calculating the total squares first, dividing them into color groups, and planning the distribution. A gradient works best on larger blankets where the transition has room to develop — on a 4×5 grid, a five-step gradient gives only one column per step.
Overview of Joining Methods
The join affects the finished look, the added width, and the time required. The four most commonly used methods are join-as-you-go (JAYG), flat seam, single crochet join, and slip stitch join. JAYG attaches each new square to existing squares as you finish the final round, requiring no separate joining step. The result has no visible seam on the right side and adds no width. Flat seam joins squares with a whip stitch or mattress stitch using a tapestry needle — fast, nearly invisible, and adds minimal width. Single crochet join is worked through both squares' edges with a hook, creating a raised ridge on the right side that becomes a visible design element. Slip stitch join is similar but produces a flatter, less visible seam than single crochet. For a complete breakdown of each method with step-by-step instructions, see the ArtPatt guide to joining granny squares.
Granny Square Blanket Border
A border serves three purposes: it covers uneven edges from joining, it frames the layout visually, and it brings the finished dimensions up to the target size. The simplest border is a single round of single crochet worked evenly around the entire blanket perimeter. Working 3 single crochets into each corner keeps the corners square and prevents puckering. From there, borders can be as simple or elaborate as the project calls for. A scallop border (groups of 5 double crochets into every other stitch, with slip stitches between) adds a traditional finish that suits any square style. A granny border — essentially a partial granny square repeat worked around the edge — maintains visual consistency with the interior squares. A reverse single crochet (crab stitch) border adds a textured rope-like edge with no extra height. For matching the border to the square style: if the squares use chain spaces, a border with chain spaces and shells reads as unified. If the squares are solid, a solid border in a contrasting color provides a clean frame. For a granny-specific look, try a shell-and-chain border that mirrors the chain spaces in the squares themselves: round 1 is a single crochet foundation worked all the way around (3 sc in each corner), round 2 adds (dc, ch1, dc, ch1, dc) shell groups into every third single crochet, with ch1 spaces between groups. This border echoes the structure inside every granny square and reads as part of the same pattern rather than a separate edging. For elegant granny square blanket borders that feel deliberate rather than tacked-on, match the border's stitch height to the square's outer round — a blanket with a tall treble outer round looks best with a tall border stitch like a shell made of trebles rather than double crochets.
How Much Yarn Do You Need for a Granny Square Blanket?
Calculating yarn for a granny square blanket is more straightforward than for a continuous colorwork blanket because each square is a discrete unit. The fastest method: crochet one complete square, weigh it on a kitchen scale, and multiply the weight by the total number of squares. Add 15% for joining yarn and border. If you do not have a scale, use the yardage estimate per square: a traditional 6-inch granny square in worsted weight uses approximately 25–35 yards of yarn including all color rounds (varying by how many rounds and how many colors). A baby blanket with 48 six-inch squares at 30 yards each needs approximately 1,440 yards total — about 8 standard worsted skeins distributed across your color choices. A throw with 80 squares at 30 yards each needs around 2,400 yards. For multicolor squares, track yardage by color: if each square uses 10 yards of Color A (center), 12 yards of Color B (middle rounds), and 10 yards of Color C (outer round), and you are making 80 squares, you need 800 yards of each color plus border. Plan color distribution before buying to avoid running short of one specific shade.
Related Articles


